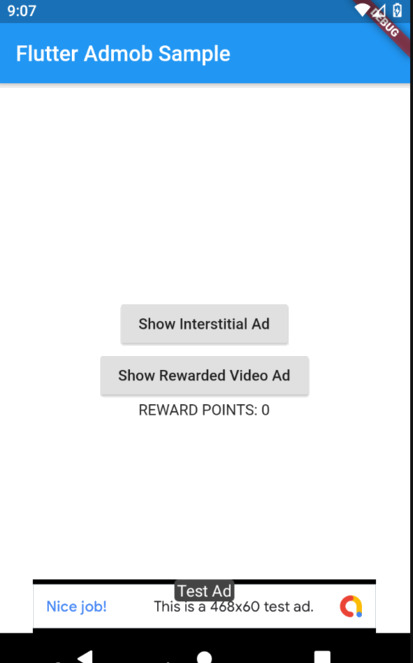
In this tutorial we will integrate Firebase AdMob in a Flutter Android Project and demonstrate each ad type: Banner, Interstitial, & Rewarded Video Ad. The project will look like this.
Prerequisite
- AdMob Account
- Added App to your AdMob
- Flutter Android App
Adding App ID to Android Manifest
First and important is add our AdMob App ID into our AndroidManifest.xml file that is located in Project>android>app>src>main
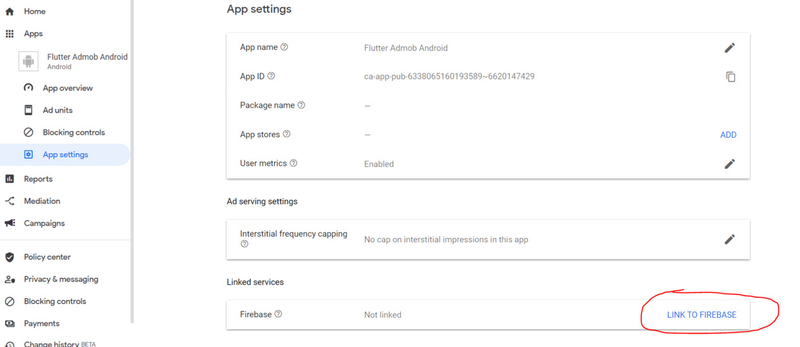
You can check your App ID under the App Settings in your AdMob.

                </activity>
        <!-- Don't delete the meta-data below.
             This is used by the Flutter tool to generate GeneratedPluginRegistrant.java -->
        <meta-data
            android:name="flutterEmbedding"
            android:value="2" />

        <meta-data
            android:name="com.google.android.gms.ads.APPLICATION_ID"
            android:value="ca-app-pub-6338065160193589~6620147429"/>
    </application>
</manifest>
Note: meta-data should be inside the application tag
Linking to Firebase
According to the Flutter Firebase AdMob package readme it says that “You are also required to ensure that you have Google Service file from Firebase inside your project.” Source: firebase_admob
It is quite easy to link your admob to firebase to get the google service file. Just go again to your App Settings in your admob and in the bottom part just click Link to Firebase(User metrics must be enabled). If you just created the app recently in your admob the User Metrics might be still in progress status, just wait for few minutes and it will be enabled.
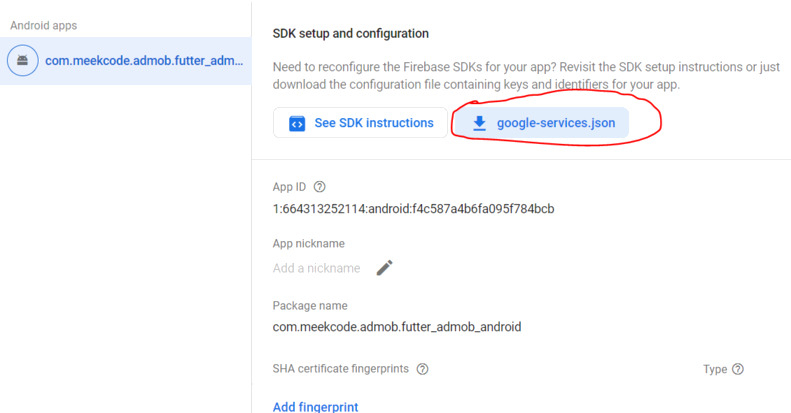
Next Click the Gear Icon>Project Settings

At the bottom part under SDK setup and configuration you can click and download your google-services.json file
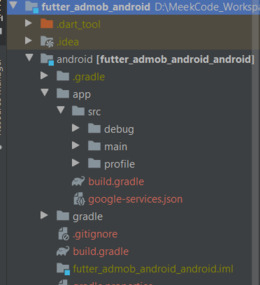
Open your android/build.gradle file (Not the app gradle) and insert the Google Services plugin under dependencies block.
dependencies {
    classpath 'com.android.tools.build:gradle:3.5.0'
    classpath "org.jetbrains.kotlin:kotlin-gradle-plugin:$kotlin_version"
    classpath 'com.google.gms:google-services:4.3.4'  // Google Services plugin
}
Now you can go to your app/build.gradle and apply the Google Services plugin.
apply plugin: 'com.android.application'
apply plugin: 'kotlin-android'
apply from: "$flutterRoot/packages/flutter_tools/gradle/flutter.gradle"
apply plugin: 'com.google.gms.google-services'  // Google Services plugin
Coding and Displaying Test Ads
First add the Firebase AdMob package into your pubspec.yaml
Package Source:
firebase_admob
dependencies:
  flutter:
    sdk: flutter


  # The following adds the Cupertino Icons font to your application.
  # Use with the CupertinoIcons class for iOS style icons.
  cupertino_icons: ^1.0.0
  firebase_admob: ^0.10.3 #Firebase Admob
Then we need to initialize it on our dart code.
@override
void initState() {
  super.initState();
  //initialize Firebase Admob
  FirebaseAdMob.instance.initialize(appId: "ca-app-pub-6338065160193589~6620147429"); //TODO: replace it with your own Admob App ID
}
Next step is we will try to show different ad format using admob test id.
Banner Ad
Showing the banner ad is the simplest as most of the time you’ll just load it only once for your screen to show. Here’s the code that will show the banner when the app screen start.
BannerAd _bannerAd;
InterstitialAd _interstitialAd;
int _rewardPoints = 0;

@override
void initState() {
  super.initState();
  //initialize Firebase Admob
  FirebaseAdMob.instance.initialize(appId: "ca-app-pub-6338065160193589~6620147429"); //TODO: replace it with your own Admob App ID

  //initialize Banner Ad
  _bannerAd = BannerAd(
    adUnitId: BannerAd.testAdUnitId, //TODO: replace it with your own Admob Banner ID
    size: AdSize.banner,
    listener: (MobileAdEvent event) {
      print("BannerAd event is $event");
    },
  );
  _showBannerAd();
  //_initRewardedVideoAdListener();
}

void _showBannerAd() {
  _bannerAd
    ..load()
    ..show(anchorType: AnchorType.bottom);
}
Note: Make sure you have internet connection and there could be a few minutes delay before it load or shows up.
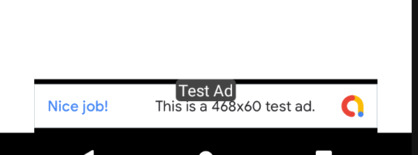
Interstitial Ad
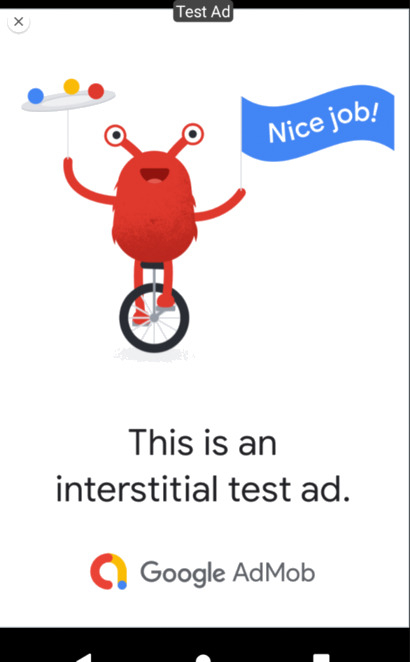
Interstitial Ads are full-screen banner ads.
In this example unlike we did in banner ad we will show the interstitial ad everytime we press a button. We will initialize a new instance before showing it so that even the interstitial is closed or finished we can still load and show a new one.
void _showInterstitialAd() {
  //initialize Interstitial Ad
  _interstitialAd = InterstitialAd(
    adUnitId: InterstitialAd.testAdUnitId, //TODO: replace it with your own Admob Interstitial ID
    listener: (MobileAdEvent event) {
      print("InterstitialAd event is $event");
    },
  );

  _interstitialAd
    ..load()
    ..show();
}
Then we can just call this function in a button to show the interstitial ad.
RaisedButton(
  onPressed: () {
    _showInterstitialAd();
  },
  child: Text("Show Interstitial Ad"),
),
Rewarded Video Ad
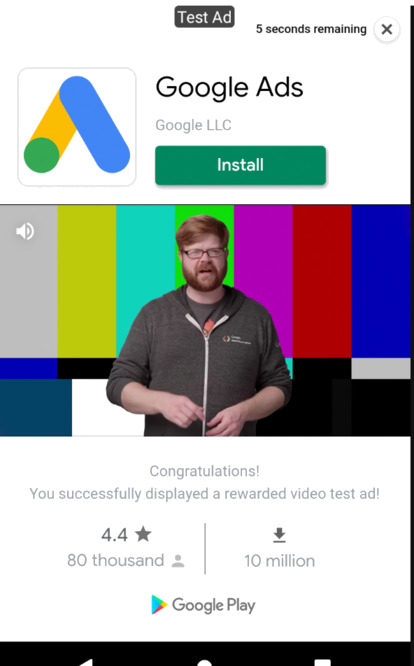
Implementing rewarded video ad is just a little bit different as it uses a Singleton object to make sure only one video ad will display or run at a time. In this example we will first initialize a listener to check its event. Also note that video ad might have more delay to load depending on the device and internet connection.
void _initRewardedVideoAdListener()
{
  RewardedVideoAd.instance.listener = (RewardedVideoAdEvent event, {String rewardType, int rewardAmount}) {
    print("RewardedVideoAd event is $event");
    if (event == RewardedVideoAdEvent.loaded)
      RewardedVideoAd.instance.show();
    else if (event == RewardedVideoAdEvent.rewarded) {
      setState(() {
        // Video ad should be finish to get the reward amount.
        _rewardPoints += rewardAmount;
      });
    }
  };
}
In this function using RewardedVideoAd.instance.listener we make sure it is properly loaded first before showing it in our app and update the reward after the video ad countdown is finish. We can call this function inside our initState.
@override
void initState() {
  super.initState();
  //initialize Firebase Admob
  FirebaseAdMob.instance.initialize(appId: "ca-app-pub-6338065160193589~6620147429"); //TODO: replace it with your own Admob App ID

  //initialize Banner Ad
  _bannerAd = BannerAd(
    adUnitId: BannerAd.testAdUnitId, //TODO: replace it with your own Admob Banner ID
    size: AdSize.banner,
    listener: (MobileAdEvent event) {
      print("BannerAd event is $event");
    },
  );
  _showBannerAd();
  _initRewardedVideoAdListener();
}
Then same as interstitial ad we will also trigger it when we press a button and have a text widget to display the reward points.
RaisedButton(
  onPressed: () {
    _showRewardedAd();
  },
  child: Text("Show Rewarded Video Ad"),
),
Text("REWARD POINTS: " + _rewardPoints.toString()),
void _showRewardedAd() {
//RewardedVideoAdEvent must be loaded to show video ad thus we check and show it via listener
//Tip: You chould show a loading spinner while waiting it to be loaded.
RewardedVideoAd.instance.load(adUnitId: RewardedVideoAd.testAdUnitId); //TODO: replace it with your own Admob Rewarded ID
}As mention earlier loading this ad could have a delay so we will call the load function of the RewardedVideoAd instance to properly load and show the video ad via its listener.
Github link: Flutter Admob Sample
Common Problems:
Q: I’ve change the IDs to my actual admob IDs but the ads are not showing and failed to load?
A: Actual Ads Ids will not show unless your app is already published in google play store so you won’t have to worry if the test ads are working fine publishing it.
Q: I’ve already published my app into google play store and use my admob IDs but it still not showing?
A: Newly published app could take a while before it can display an ad, just be patient and it will work soon.
Q: I’m receiving a warning that “Google Play services is missing”
A: This warning is commonly just shown for emulators or devices that have no Google Play App installed or updated.
Q: The rewarded points is not updated when using rewarded video ad
A: Make sure to finish the video countdown shown on the upper right of the video ad and use setState to update your ui changes in flutter.

